
Two of my nieces (sisters) decided that they wanted to be mermaids for Halloween and that their baby sister needed to be one as well just to round things out. So I got to come up with and make 3 mermaid costumes this year. One for an infant, one for a pre-teen, and one in the middle. I thought, why not turn this into my first ever sewing tutorial? So, I give you "How to Make a Baby Mermaid Costume Bunting," with additional instructions coming later for turning the baby costume into a skirt/fin for a girl of any size:
What you'll need:
Shiny fabric in 2 coordinating colors
Thread to match
3/4" Elastic
Elastic bobbin thread
The fabric that we chose to use for the main body of the costume was a tissue lame, and we used a shiny polyester fabric for the fin. To determine how much fabric you'll need to buy, take bust, waist, and hip measurements, and a measurement from the center back between the shoulder blades down to heels. If your fabric isn't stretchy (mine wasn't), you want your body fabric to have some wiggle room, so add 5 inches to whichever of the first 3 measurements was the largest. Add 3 inches to the back length measurment. So your main fabric needs to be at least Waist/Hip/Bust + 5" X Back Length + 3" big. If your fabric has some stretch to it this will need to be adjusted (if you're using spandex or lycra you might not need to add anything to the girth of the costume, but it'll be pretty snug fitting). The accent color needs to be as wide as the main fabric, but only 8-12 or so inches long (this is up to you and how much fin you want. If you bought lame like I did, it might be a good idea to zig-zag the edges all around to keep it from fraying too much.
Once you have your fabric cut, fold the fabric lengthwise in half, right sides together. Sew along the cut edges leaving 5/8" seam allowance. You should have a tube of fabric now. Decide which end you want to be the top. With the skirt still inside out, fold the top over 1/2" so that the right side (or pretty side) of the fabric is being rolled outwards. Roll another 1" and pin it all around. This is your elastic casing. Sew all around this casing as close to it's bottom edge as you can, but be sure to leave a 1" opening to thread the elastic through.

Now it is time to make and attach the fin. Fold the fin fabric in half and cut a curved edge from the top to the bottom, cutting through both layers, like this:

Run a tight zig-zag stitch around the edges, or do a rolled edge if you have a serger. Ther curved edge is the front of your fin. Find the center back of the skirt and the center back of the fin. Pin the center backs together with the fin UPSIDE DOWN and right side in and the skirt right side out. Continue to pin from this point around the skirt until the front points meet. They will overlap a little bit and that is good. It should look like this:
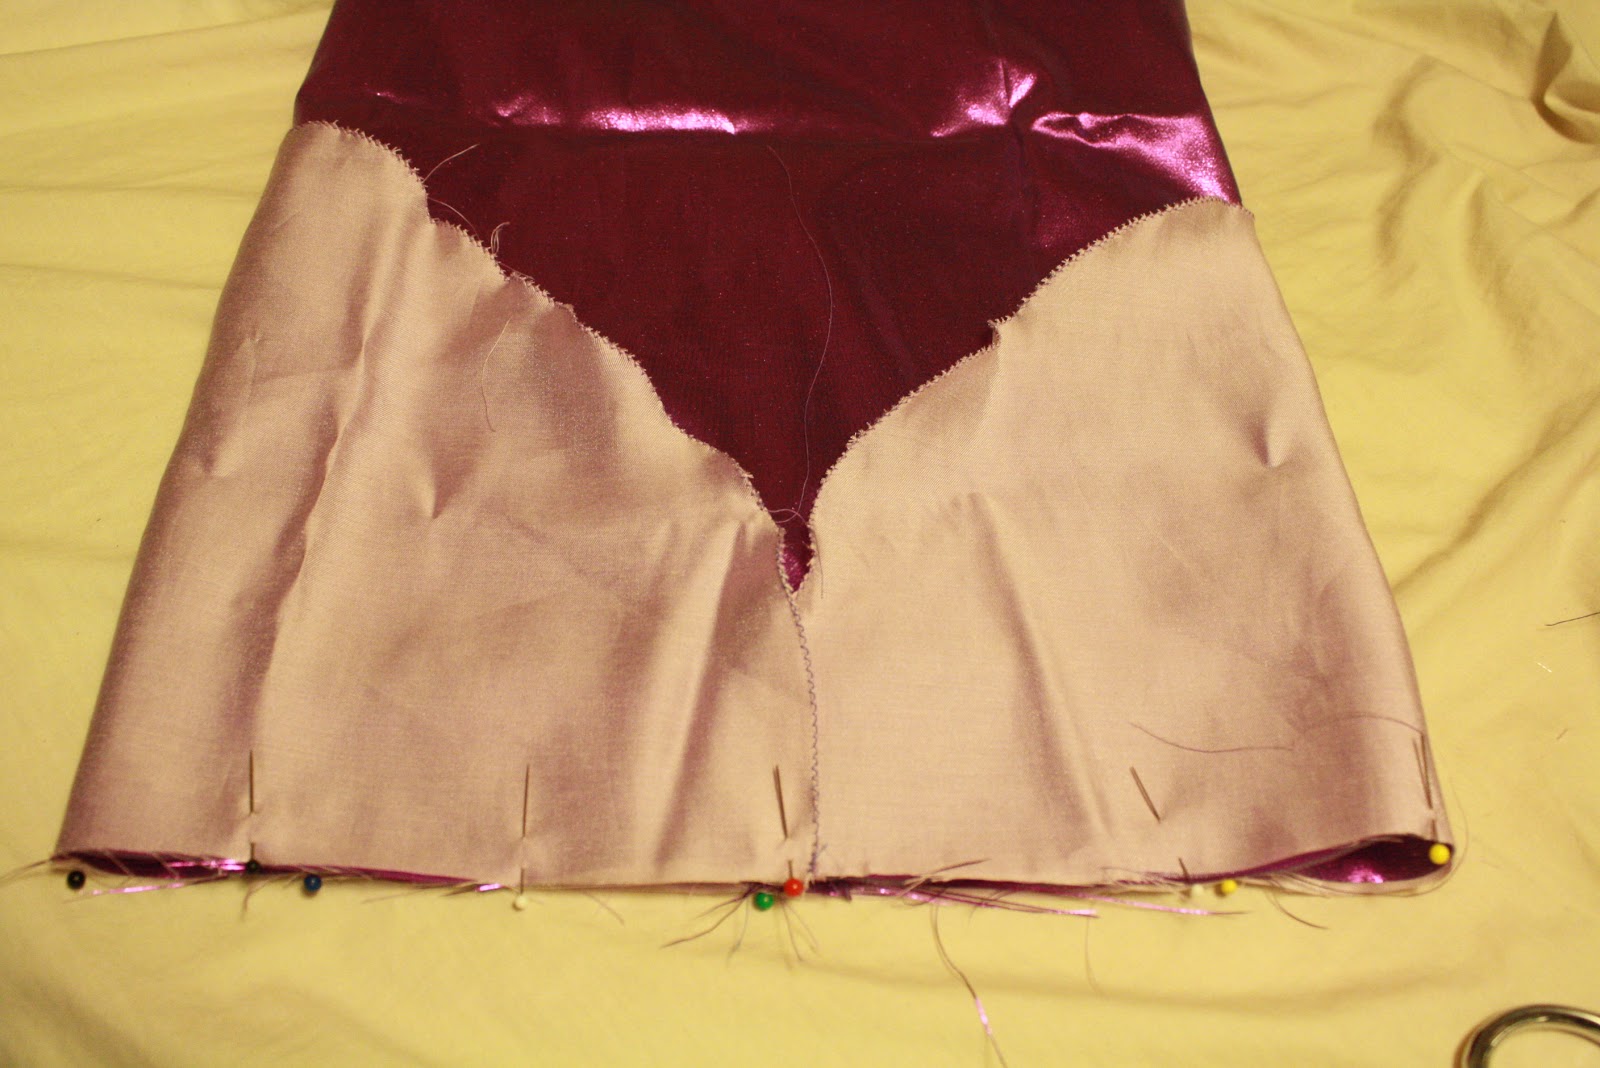
Starting with the overlapped area of the fin (the front), sew the fin onto the skirt leaving 5/8" seam allowance. When you are finished, flip the fin down and it'll look like so:

Fold the seam allowance towards the top of the skirt. Now, to create a "bunting" I used elastic bobbin thread and stitched around the bottom of the skirt portion which caused the skirt to gather, making sure that I caught the seam allowance in the stitching so that it stayed in place. If you haven't ever used elastic bobbin thread, I recommend reading up on it or watching tutorials on YouTube (like this one). The key is to wind the elastic thread on the bobbin by hand without stretching it. Once you have the elastic thread sewn in the bottom of the tail will be gathered together giving it the shape of a tail and causing the fin to flare out...but it also has the beauty of being stretchy so if you need to change a diaper it'll stretch to go up and over baby's bottom! All that is left now is to cut the elastic for the top to fit your baby. Make sure you stretch the elastic out a few times before wrapping it around your baby's chest just under her arms. Cut it the length that it takes for the elastic to meet around her chest. Thread through the casing by putting a safety pin on one end of the elastic and threading it through. Overlap the elastic 1" and sew together, adjust the elastic into the casing, try it on your baby, and (assuming it fits right) sew the casing shut. Voila! One teeny mermaid!! It you want, you can add straps or a neck tie for flair.
I'll be posting a picture of the finished product once I get one of my niece in it...but I forgot to take one when she came to try it on and sent it home with mom! Whoops! Oh well, it'll be up here soon, I promise. I just couldn't wait to do the tutorial.
So there it is, my first ever sewing tutorial. Enjoy your pint-sized mermaid this Halloween!
Comments
Post a Comment